Search

Donnerstag, 20. Januar 2022

Change VCSA FQDN and IP in a Nutanix Environment

 Change VCSA FQDN and IP in a Nutanix Environment:

First, check everything is up an running and there are no problems at all.

Be sure, you have all needed credentials (SSO-Admin, Domain Admin. etc...)

Be sure you have the new fqdn and the new IP as well as the corresponding DNS-Entry. An eventually new VLAN should be available on your vSphere Environment.

First, take a backup (snapshot) of your VCSA.

Then uninstall vCenter Plugins an unregister your vCenter from your Nutanix PRISM:


Then leave the AD-Domain via the vSphere Webclient (logged in with SSO-Admin):


A reboot of the VCSA is required, you ca do this via VAMI (IP:5480) and the root user of the VCSA.
After the VCSA has rebooted and all services are started (Check via VAMI), we can continue to change the FQDN andf IP of the VCSA, we will perform this in VAMI -> Networking:
Be sure, your new IP and FQDN are resolvable via DNS!


Check, everything is correct before you press finish.

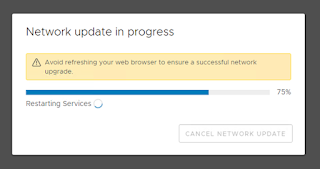
Then a progess window appears:


You should ping the old vCenter IP, if there is no more answer, you can login to the ESX-hostclient of the ESX-Server, where the VCSA is running and change the VLAN of the VCSA-VM.
Now ping the new IP-adress and you should reach it. You should be redirected after some time to the new IP/FQDN of the VCSA. If not, wait about 10 minutes and connect to the new fqdn-VAMI and logon, then you should see again the progress bar:


After finishing all tasks and restarting all services, you will be redirected to the login page and have to reauthenticate:


Now, you can check within VAMI, that the VCSA has a new fqdn and ip and all services are up and running:

The you can switch to webclient and check, everything is fine, too.
Then you have to join the AD-domain from webclient:


You have to perform a reboot of the VCSA after joining the domain, you perform this from VAMI.

After restarting, check, everything is running, then you eventually have to register your plugins and register the new VCSA in Nutanix PRISM:


Now you should be done, just check, your backup and monitoring is aware of the "new" vCenter.

If you are using custom certificates, you have to recertificate your vSphere-environment.
If some services didn't come up after changing FQDN and IP, you can try recertificate the VCSA also with selfsigned certificates, if you still have problems, you can go back to your snapshot and try again!

If all is working as desired, delete your snapshot! 


Mittwoch, 19. Januar 2022

Change RF-Mode of a Nutanix Storage Container

To check the Redundancy Factor of the Cluster:

ncli cluster get-redundancy-state

To check the Container Redundancy Factor:

ncli ctr ls|egrep -i "Name |Replication"

To change the RF-Mode of a Nutanix Storage Container, first show the Conatainer Details:

ncli ctr ls

Identify the correct Container and note the ID of it (all digits after the :: on the ID line)

For example:

ID : 00052c80-729d-8761-000000052fb::1085

Change the Conatiner RF Mode:

ncli ctr edit rf=RF-Mode id=Container_ID  (force=true)

For example:

ncli ctr edit rf=3 id=1085

For the NutanixManagementShare Container, you need the additional force=true Parameter


Montag, 17. Januar 2022

Set Active Network Interface in AHV active-backup configurations

 To check which NIC is active please connect to the AHV host, run the following command:

[root@ahv ~]# ovs-appctl bond/show

In the command output, the active interface will be marked as an active slave.

To change active NIC please connect to the AHV host and run the following command
this sets the active interface!:

[root@ahv ~]# ovs-appctl bond/set-active-slave <bond name> <interface name>

Example:

[root@ahv ~]# ovs-appctl bond/set-active-slave br0-up eth2

This sets eth2 as active interface

You can perform this from CVM with hostssh "Command" for the whole Cluster to set all Active links on one physical Switch if needed.


IPMI (ILO) Configuration via ipmitool

AHV

 To Reset IPMI via ipmitool (if not responding etc)

you can connect to an AHV Host and then

ipmitool mc reset cold

or you can do this for the whole cluster from CVM with:

hostssh "ipmitool mc reset cold"

This resets all IPMIs in the cluster.


To add an user you can check via 

ipmitool user list 1 

wich userspace is unused.

then

** User create on 3

ipmitool user set name 3 ILOUSER

** User set password for 3

ipmitool user set password 3 PASSWORD

** User set Admin privileges (4)

ipmitool channel setaccess 1 3 link=on ipmi=on callin=on privilege=4

Possible privilege levels are:
   1   Callback level
   2   User level
   3   Operator level
   4   Administrator level
   5   OEM Proprietary level
  15   No access

**Enable User 3

ipmitool user enable 3


You can use all of these commands from CVM with hostssh in " "

to set this for the whole cluster.

Example hostssh "user set name 3 USER"


ESXi

On an ESXi Host you can use ./ipmicfg wich can do most in one command:

hostssh "./ipmicfg -user add <ID> <NAME> <PASSWORD> <PRIVILEGE>"

Example:

hostssh "./ipmicfg -user add 3 ADMIN P@ssw0rd 4"

To reset the BMC use:

./ipmicfg -r


Disable HA high availability Nutanix AHV Cluster


To disable HA completely on the cluster, use the following command from nutanix user of any CVM in that cluster:

acli ha.update enable_failover=0
acli ha.get

After running acli ha.get, you should see 'ha_state: "kAcropolisHADisabled"' and also on Prism dashboard under VM Summary widget.


To re-enable HA, please use the following command:

acli ha.update enable_failover=1
acli ha.get

This command disables HA on the complete cluster and not on individual node. It is recommended to disable HA only if it is absolutely required.