Search

Donnerstag, 16. Oktober 2025

Broadcom / Vmware VCSA and Lifecycle Manager Updates cannot be downloaded (due to missing download token)


(Important Update: Changes to How You Download VMware Software Binaries - VMware Cloud Foundation (VCF) Blog)

It is necessary, to generate a download token in Broadcom Support Portal to get updates for VCSA or ESXi.


Generate Donwload Token:

  1. Login to Broadcom Portal
  2. Go to Quick Links „Generate Download Token)
  3. Select Site ID and klick “Generate Token”


vCenter Update: VCSA-Settings


  1. Login to VCSA (https://vcenter_server_fqdn/IP:5480)
  2. Change to Update
  3. Settings
  4. Copy the yellow part of the Download URL
    1. https://vapp-updates.vmware.com/vai-catalog/valm/vmw/XXXXXXXX-XXXX-XXXX-XXXX-XXXXXXXXX/<current_version>.latest
  5. Change to „Specified“ and create a new Download URL using the token and the part you have copied:
    1. https://dl.broadcom.com/<downloadToken>/PROD/COMP/VCENTER/vmw/XXXXXXXX-XXXX-XXXX-XXXX-XXXXXXXX/<current_version>.latest


Now, the Update should work.


ℹ️ Extended Info from Broadcom:

  • Further patches automatically update this URL. For example, if you patch 8.0.3.00400 to 8.0.3.00500, the default URL will change to end in 8.0.3.00500.


So, no further changes should be necessary.


See also:

Error: "The vCenter Server is not able to reach the specified URL" vCenter Server patching via VAMI fails to download the updates from online repositories


Ein Bild, das Text, Software, Webseite, Screenshot enthält.

KI-generierte Inhalte können fehlerhaft sein.


ESXi Update: Lifecycle Manager-Settings


  1. Login to vCenter Client and navigate to Lifecycle Manger
  2. Go to „Settings“ - „Administration“ - „Patch Setup”
  3. Deactivate all VMware Download Sources
  4. Add the following new Download Sources:
    1. https://dl.broadcom.com/<DownloadToken>/PROD/COMP/ESX_HOST/main/vmw-depot-index.xml
    2. https://dl.broadcom.com/<DownloadToken>/PROD/COMP/ESX_HOST/addon-main/vmw-depot-index.xml
    3. https://dl.broadcom.com/<DownloadToken>/PROD/COMP/ESX_HOST/iovp-main/vmw-depot-index.xml
    4. https://dl.broadcom.com/<DownloadToken>/PROD/COMP/ESX_HOST/vmtools-main/vmw-depot-index.xml
  5. Restart Update Manager Service in VCSA (ssh VCSA service-control --restart vmware-updatemgr) | alternatively via VCSA GUI
  6. Download Updates „Lifecycle Manger“ - „ACTIONS“ -  „Sync Updates“


See also:

"A general system error occurred: Failed to download VIB(s): Error: HTTP Error Code: 403", vLCM fails to download the ESXi patches and images from online repositories


Ein Bild, das Text, Zahl, Quittung enthält.

KI-generierte Inhalte können fehlerhaft sein.

Ein Bild, das Text, Schrift, Reihe, Zahl enthält.

KI-generierte Inhalte können fehlerhaft sein.


Problems using LCM for SPP Updates after changing Hosts to UEFI/Secure Boot on HPE HW prior Gen11

After changing Boot Settings to UEFI/Secure Boot on HPE HW prior to Gen11, phoenix is unable to boot due to missing SecureBoot Keys, so FW Upgrades via LCM are not possible.

To fix this, get the Key:

https://download.nutanix.com/kbattachments/Nutanix_Secure_Boot_v3.cer

put it on a USB Stick. Insert the Stick in a Server USB Port (not ILO USB)

enter RBSU on the affected Server:

Enter Maintenance Mode, Reboot the Server

press F9

Enter System Configuration

BIOS/Plattform Configuration (RBSU)

Server Security

Secure Boot Settings

Advanced Secure Boot Options

KEK - Key Exhange Key

Enroll KEK Entry

Enroll KEK using File

File Systems on attached Media

Choose your USB Device

Locate the File


Commit Changes and Exit


After enrolling, you can view KEK Entrys:


You should see the Nutanix Entry now.

Leave RBSU (F12 Save and exit) and continue normal Boot

You are able to Update FW through LCM now.


Freitag, 10. Oktober 2025

Change Cluster an Storagecontainer from RF2 to RF3

 You can change your FT Level from 1N/1D to 2N/2D (if you have 5 or more Hosts) in the Prism GUI:


Then you have to change the RF at Storagecontainerlevel as well:

show all Container:

nutanix@NTNX-x:~$ ncli
<ncli> ctr list

Change RF to 3:

nutanix@NTNX-x:~$ ncli
<ncli> ctr edit name=CONTAINERNAME rf=3

for the Nutanix Management Share you have to login as admin:

nutanix@NTNX-x:~$ ncli -h true
<ncli> ctr update name=NutanixManagementShare rf=3 force=true


Mittwoch, 2. April 2025

Migrating Nutanix Files Cluster via Async PD to another cluster

If you want to use Async PD for File Server Migration purposes:

Create the Storage Container on the Target Side.

Create a Remote Site from the Source to the Traget Cluster and Vice Versa, enable the Storage Container Mappings. Edit the Schedules of the Default created PD to replicate to the Remote SIte.

After Replication has finished, on the Source Site choose the PD and select Migrate.

After the Migration finished, you can go to Target Site and chose File Servers, here you select the File Server (needs Activation) and click Activate.

During the Activation Process, you have to enter all the IPs again (if you stay on the same Networks) or choose new networks and IPs (don't forget to refresh your DNS Entrys).

To clean up the Source Site: (Option1)

Remove the PD containing the Source File Server, remove Schedule first.

This hould remove the inactive Fileserver as well.

The use putty to connect to the cluster as nutanix

Then CVM: ncli file-server list

Look for your file server, it should be not there otherwise the Status should be Not Active, then note the UUID

then

CVM: ncli file-server rm uuid=<uuid you noted> force=true

This should cleanup your source site.

Then look for your Storage Container in the GUI , it should be empty , and remove it (if not used by other entities), Maybe you have to use the CLI to remove:

CVM: ncli ctr ls

CVM: ncli ctr rm name=<NAME> [ignore-small-files=true ]

or you can try cleanup all in one (Option 2):

CVM: ncli file-server list

CVM: ncli file-server rm uuid=<uuid> force=true delete-pd-and-snapshots=true delete-container=true

Accessing Nutanix Storage Containers for upload/download

 If you need to download/upload files to a storage container:


  1. Open WinSCP.

  2. Connect to the CVM IP using SFTP protocol and port 2222.

  3. Login using the admin/prism element credentials.(not nutanix!)

  4. Enable the option to show hidden files by going to Options > Preferences > Panels and then selecting the “Show hidden files”  option under the common settings.


From here you can either upload or download files to the container.


Be carefull with deleting files here, you should not do that via WinSCP, use Nutanix GUI or CLI and only if you know what you do :-)

Sonntag, 16. März 2025

Nutanix with ESXi - Unable to boot into Phoenix using One-Click Update with Secureboot enabled

We had the problem with some customers who used Nutanix with vSphere that the host could not boot into phoenix during the one-click update.


The problem is that for vSphere 8 the boot was changed to Uefi and all settings for TPM (Secureboot and Intel TXT) were set.

The Secureboot certificates for Nutanix must then be installed manually. 

Nutanix certificates for SecureBoot are located at:

https://download.nutanix.com/kbattachments/Nutanix_Secure_Boot_v3.cer

These certificates have an expiration date Mar 22, 19:52:03 2031 GMT.

If the node doesn't have the Nutanix certificate installed in its BIOS, phoenix will not be booted if Secureboot enabled.


Freitag, 17. Januar 2025

Problems with HPE Nodes after adding 2nd CPU

This Problem occured on HPE DX380 Gen10, but I think it will be on other vendors too.

After adding 2nd CPU, the CVM will not boot as PCI devices get newly enumerated: 

[root@AHV1 ~]# virsh list --all

 Id   Name                    State

----------------------------------------

 -    NTNX-CVM   shut off


[root@sAHV1 ~]# virsh start NTNX-CVM

error: Failed to start domain 'NTNX-CVM'

error: Hook script execution failed: internal error: Child process (LC_ALL=C PATH=/usr/local/sbin:/usr/local/bin:/usr/sbin:/usr/bin /etc/libvirt/hooks/qemu NTNX-CVM prepare begin -) unexpected exit status 1: [Errno 2] No such file or directory: '/sys/bus/pci/devices/0000:b1:00.0/driver_override'

To resolve this, look in a not yet expanded Node from the same cluster what "b1:00.0" is:

[root@sAHV2 ~]# lspci

...
b1:00.0 Serial Attached SCSI controller: Adaptec Smart Storage PQI 12G SAS/PCIe 3 (rev 01)
...
then look in your expanded node which address  "Adaptec Smart Storage PQI..." has:

[root@sAHV1 ~]# lspci

....
5c:00.0 Serial Attached SCSI controller: Adaptec Smart Storage PQI 12G SAS/PCIe 3 (rev 01)
....

so you got 5c.00.0

then edit your CVM.xml on your expanded node:

[root@AHV1 ~]# virsh dumpxml NTNX-CVM  (only to view .XML)

[root@AHV1 ~]# virsh edit NTNX-CVM      (to edit .xml)

ORIGINAL:
.....

<video>
      <model type='cirrus' vram='16384' heads='1' primary='yes'/>
      <address type='pci' domain='0x0000' bus='0x00' slot='0x02' function='0x0'/>
    </video>
    <hostdev mode='subsystem' type='pci' managed='yes'>
      <source>
        <address domain='0x0000' bus='0xb1' slot='0x00' function='0x0'/>
      </source>
      <rom bar='off'/>
      <address type='pci' domain='0x0000' bus='0x00' slot='0x06' function='0x0'/>
    </hostdev>
...

EDITED:

....
<video>
      <model type='cirrus' vram='16384' heads='1' primary='yes'/>
      <address type='pci' domain='0x0000' bus='0x00' slot='0x02' function='0x0'/>
    </video>
    <hostdev mode='subsystem' type='pci' managed='yes'>
      <source>
        <address domain='0x0000' bus='0x5c' slot='0x00' function='0x0'/>
      </source>
      <rom bar='off'/>
      <address type='pci' domain='0x0000' bus='0x00' slot='0x06' function='0x0'/>
    </hostdev>
....

Then you can start your CVM with:

[root@sAHV1 ~]# virsh start NTNX-CVM

and it will start :-)

Donnerstag, 20. Juni 2024

Migrate Server 2003 VMs form vSphere to Nutanix (AHV)

 How to migrate W2003 VMs form vSphere to Nutanix (totally unsupported but usefull sometimes). Should also work for XP, W2000 is only possible with IDE and E1000 Nic.

First you have to use MergeIDE.bat on the Source VM, execute it and reboot, this step is essential, otherwise the VM won't boot.

MergeIDE can be downloaded at:

http://www.virtualbox.org/attachment/wiki/Migrate_Windows/MergeIDE.zip

Then use Move to Migrate the VM, bypass any guest operations. After cutover, Power Off the VM as it will be in Bluescreen :-)

then use acli on a CVM to manipulate the disks:

acli

acropolis> vm.get <VMName>

There you can see your disks and uuids, mostly ide.0 will be your CD-Rom, because of that we will set the temporary bootdisk to ide.1 and later to pci.0, thats why the datadisks will start with pci.1

acropolis> vm.disk_create <VMName> clone_from_vmdisk=<uuid of scsi.0> bus=ide index=1

This clones your scsi.0 disk (Boot disk) to ide.1

acropolis> vm.disk_delete <VMName> disk_addr=scsi.0

Deletes your scsi Bootdisk as its new at ide.1 now

acropolis> vm.disk_create <VMName> clone_from_vmdisk=<uuid of scsi.1> bus=pci index=1

This clones your scsi.1 disk to pci.1 (needed for SCSI Driver Install later, if you have just one disk, create a 1GB SCSI disk in the GUI first)

acropolis> vm.disk_delete <VMName> disk_addr=scsi.1

Deletes your scsi Datadisk as its new at pci.1 now

Now Power on your VM and log on.

Mount the Fedora VirtIO-Drivers ISO to the VM and install all drivers, then you will see your NIC and the Datadisk (SCSI) in your Device Manager, you still have the SCSI Pass through Controller and a unknown Device, but you can ignore this.Every disk installs its own SCSI Controller. Then set your IP Adress and Screen Resolution and shutdown the VM.

Download Link for the Drivers:

https://fedorapeople.org/groups/virt/virtio-win/direct-downloads/archive-virtio/virtio-win-0.1.240-1/virtio-win.iso

Be carefull, Check first, if you are using W2003 64Bit or 32Bit, to use correct drivers....


then again to acli:

acropolis> vm.disk_create <VMName> clone_from_vmdisk=<uuid of ide.1> bus=pci index=0

Clones your Bootdisk from ide.1 to pci.0

acropolis> vm.disk_delete <VMName> disk_addr=ide.1

Deletes your ide Bootdisk as its new at pci.0 now

Boot up your VM, it should run now at PCI SCSI Disks and have a little bit more performance as on IDE , you have to install one more time drivers for your bootdisk.

Uninstall VMware Tools and you should be fine.

If you have more than 2 disk, repeat the steps for disk 3 to x

If you have Dynamic disks, you have to reactivate them in Disk Manager


Mittwoch, 13. März 2024

Show HPE iLO Advanced Key

The ilo advanced key is not displayed completely in the HTML interface and is censored by XXXX

You can display it as xml with the following URL:

https://IP-ADDRESS/xmldata?item=cpqkey


Montag, 20. November 2023

Adding / changing uplinks in vs0 virtual switch configuration failed at nutanix single node cluster

The update of a virtual switch vs0 failed at nutanix single node clusters because the cluster is unable to perform a rolling reboot. You have to convert the switch and change the uplinks via the old manage_ovs commands and convert it back:

  1. Disable the cluster VS(No downtime)
    1. acli net.disable_virtual_switch
  2. Then upgrade the bridge via the CVM with the correct details:
    1. Uplink with LACP:

                                                              i.      manage_ovs --bridge_name br0 --interfaces <interface names> --bond_name br0-up --bond_mode balance-tcp --lacp_mode fast --lacp_fallback true update_uplinks

    1. Uplink without LACP:

                                                              i.      manage_ovs --bridge_name br0 --interfaces <interface names> --bond_name br0-up --bond_mode <active-backup/balanced-slb> update_uplinks

  1. Then verify connectivity to the CVM and AHV host
  2. Migrate the bridge back to a VS:
    1. acli net.migrate_br_to_virtual_switch br0 vs_name=vs0

Freitag, 10. November 2023

Expanding Cluster different Vendor / License Class

 If you got problems at expanding your cluster with nodes from different vendor, be carefull as this is not supported. Sometimes you have to do this to replace all nodes of a cluster with new ones from a different vendor, so do this only for migration purposes, never run a mixed vendor config in production environments!

(In our case, we replaced Nutanix NX-Nodes with HPE DX)

Maybe the expand fails, as the new vendor has a different license class , so you can edit the file:

/etc/nutanix/hardware_config.json on the nodes, you want to add:

In the section

"hardware_attributes":

you will find an entry 

"license_class": "software_only",

Remove this entry on all nodes you want to add and perform a genesis restart on this node. (You have to use sudo to edit the file!)

After expanding the cluster and removing the old nodes, put this entry back in the hardware_config.json and perform an allssh genesis restart on the cluster.

Then everything should be fine.


Maybe you also get an error at the prechecks from test_cassandra_ssd_size_check even if your SSD-Sizes are fine according to KB-8842

Then maybe your /etc/nutanix/hcl.json file on the existing cluster doesn't contain the SSDs in the new nodes. In this case check the hcl.json on the new nodes if this contains the SSDs. In this case copy the hcl.json from one of the new nodes to all CVMs in the running cluster, perform allssh genesis restart at the cluster and try again.

(Copy the file somewhere to /tmp and then use sudo mv to get it to /etc/nutanix/)

Maybe, Licensing of the "converted" Cluster may not work as expected, as the cluster thinks , he is still on "license_class": "appliance".  

You can check your downloaded csf for the license class of the Nodes, if this is wrong, engage Nutanix support, they will provide a script to check and to set:

python /home/nutanix/ncc/bin/license_config_zk_util.py --show=config

python /home/nutanix/ncc/bin/license_config_zk_util.py --convert_license_class --license_class=<software_only/appliance>

to fix this in PC Versions prior to PC pc.2023.1.0.2 . 

Later Versions has the ability to use "ncli license update-license license-class="<software_only/appliance>".

After updating wait about 1 hour, then you can try licensing from PC again (check the csf, if the Nodes now show the correct license_class)

Sometimes after removing a node (or all, in case of renewing the hardware) you can't reach the virtual cluster ip (cvms are reachable) or you can't resolve alerts. In this case Prism leader did not change correctly to a new node. You can fix this by restarting Prism:

allssh genesis stop prism;cluster start

Mittwoch, 1. Februar 2023

Error installing SSL certifcate on VCenter 7.0.3

Error occurred while fetching tls: String index out of range: -1 


If you've got this error while replacing the Certificate through the UI Interface, try to not use the "Browse file" dialog. Just open the certificate in Text editor and copy/paste it in the required field.


Mittwoch, 18. Januar 2023

HPE SPP Installation not possible via LCM on HPE DX Hosts

If somebody accidentaly updated Firmwares on a HPE DX Node manually, it won't be possible to install Firmwares (SPP) on the node via LCM, as Nutanix expects special Versions of SPP on the node. (In LCM hover over the Question mark an it shows you, wich Versions are supported for Update)

Also, if you have LCM Versions older than supported, Nutanix won't show you Updates, so you can fake the SPP Version on the Nodes to get SPP Updates. See the Matrix of supported versions:

https://portal.nutanix.com/page/documents/kbs/details?targetId=kA00e000000CvDhCAK

You can fix this and make LCM believe, you have such a version (but be careful, it should be a SPP-version, that reflects the FW-Versions, that are installed):

You should ssh to the affected host and then:

[root@host ~]# export TMP=/usr/local/tmpdir

[root@host ~]# ilorest --nologo login

[root@host ~]# ilorest --nologo select Bios.      The dot is important!

[root@host ~]# ilorest --nologo get ServerOtherInfo

Now you can see, the Version of SPP the node has

Set the version to nothing, if something wrong is inside:

[root@host ~]# ilorest --nologo set ServerOtherInfo='' --commit

Set the version to the correct expected version:

[root@host ~]# ilorest --nologo set ServerOtherInfo='2021.04.0.02' --commit

Check, if everything is fine:

[root@host ~]# ilorest --nologo get ServerOtherInfo

[root@host ~]# ilorest --nologo logout

No you can perform a LCM Inventory and the SPP-Update should be possible

If you got the error:

ilorest: error while loading shared libraries: libz.so.1: failed to map segment from shared object

use a different tmp dir as follows:

[root@host ~]# export TMPDIR=/root/

and it will work.

This works for AHV and ESX7.x 

For ESX 8.x , you have to open ilorest via /opt/ilorest/bin/ilorest.sh on the host.

ilorest: login

ilorest: select Bios.

ilorest: set ServerOtherInfo='2021.04.0.02' --commit

ilorest: logout

ilorest: exit

Mittwoch, 26. Oktober 2022

Cleanup /home partition CVM if kb1540 does not help

If the kb article 1540 at Nutanix to clean up the CVMs does not help, the clickstream folder can be cleaned up.

please run the following command on the affected cvm

find ~/data/prism/clickstream -name 'client_tracking*' -mmin +7200 -type f -exec /usr/bin/rm '{}' +

and cleanup /data/prism audit-logs with e.g. (in folder /data//prism)

/bin/rm api_audit-2022*

Dienstag, 5. Juli 2022

Modify Password Expiry for Nutanix admin

To view current password age for admin user, execute chage command as follows:

nutanix@cvm$ sudo chage -l admin


Last password change                                    : May 22, 2007

Password expires                                        : never

Password inactive                                       : never

Account expires                                         : never

Minimum number of days between password change          : 0

Maximum number of days between password change          : 99999

Number of days of warning before password expires       : 7


To disable password aging / expiration for user admin , type command as follows and set:

Minimum Password Age to 0

Maximum Password Age to 99999

Password Inactive to -1

Account Expiration Date to -1


nutanix@cvm$ sudo chage -m 0 -M 99999 -I -1 -E -1 admin


You can even do this, if the GUI Logon wants you to change your admin password, just ssh to a CVM an execute the Command, then after a refresh , you can logon with your existing Password.

Donnerstag, 3. März 2022

Nutanix LCM Lifecycle Manager Catalog Cleanup

If LCM Firmwareupdates (i.g. HPE DX SPP Updates) cannot be applied, you can try the following steps:


1. Clear Browser Cache

if clearing does not solve the problem you can "reset" your lcm by catalog cleanup from any of the CVMs:

Run the following 4 commands one by one:

- python /home/nutanix/cluster/bin/lcm/lcm_catalog_cleanup

- python /home/nutanix/cluster/bin/lcm/lcm_catalog_cleanup --lcm_cleanup_cpdb

- allssh genesis stop catalog; cluster start

- cluster restart_genesis

After this, please retry performing inventory.

Montag, 14. Februar 2022

Cant' register vCenter in Nutanix

 If you can't register vCenter in Nutanix as a wrong IP is discovered, check vpxa.cfg on the ESXi Hosts. Possibly you have to change the vpxa.cfg on the hosts. This mainly happens, after changing VCSA IP and/or hostname. First check, if vCenter can communicate with the hosts.

If Communication is established and it's not possible to permanently change the configuration or VMware changes back the configuration automatically, you may have a look on this setting in the VCSA (IP Address missing, Name wrong etc):


Donnerstag, 20. Januar 2022

Change VCSA FQDN and IP in a Nutanix Environment

 Change VCSA FQDN and IP in a Nutanix Environment:

First, check everything is up an running and there are no problems at all.

Be sure, you have all needed credentials (SSO-Admin, Domain Admin. etc...)

Be sure you have the new fqdn and the new IP as well as the corresponding DNS-Entry. An eventually new VLAN should be available on your vSphere Environment.

First, take a backup (snapshot) of your VCSA.

Then uninstall vCenter Plugins an unregister your vCenter from your Nutanix PRISM:


Then leave the AD-Domain via the vSphere Webclient (logged in with SSO-Admin):


A reboot of the VCSA is required, you ca do this via VAMI (IP:5480) and the root user of the VCSA.
After the VCSA has rebooted and all services are started (Check via VAMI), we can continue to change the FQDN andf IP of the VCSA, we will perform this in VAMI -> Networking:
Be sure, your new IP and FQDN are resolvable via DNS!


Check, everything is correct before you press finish.

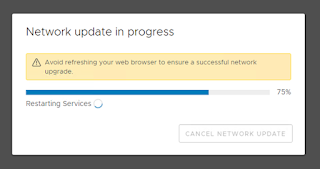
Then a progess window appears:


You should ping the old vCenter IP, if there is no more answer, you can login to the ESX-hostclient of the ESX-Server, where the VCSA is running and change the VLAN of the VCSA-VM.
Now ping the new IP-adress and you should reach it. You should be redirected after some time to the new IP/FQDN of the VCSA. If not, wait about 10 minutes and connect to the new fqdn-VAMI and logon, then you should see again the progress bar:


After finishing all tasks and restarting all services, you will be redirected to the login page and have to reauthenticate:


Now, you can check within VAMI, that the VCSA has a new fqdn and ip and all services are up and running:

The you can switch to webclient and check, everything is fine, too.
Then you have to join the AD-domain from webclient:


You have to perform a reboot of the VCSA after joining the domain, you perform this from VAMI.

After restarting, check, everything is running, then you eventually have to register your plugins and register the new VCSA in Nutanix PRISM:


Now you should be done, just check, your backup and monitoring is aware of the "new" vCenter.

If you are using custom certificates, you have to recertificate your vSphere-environment.
If some services didn't come up after changing FQDN and IP, you can try recertificate the VCSA also with selfsigned certificates, if you still have problems, you can go back to your snapshot and try again!

If all is working as desired, delete your snapshot! 


Mittwoch, 19. Januar 2022

Change RF-Mode of a Nutanix Storage Container

To check the Redundancy Factor of the Cluster:

ncli cluster get-redundancy-state

To check the Container Redundancy Factor:

ncli ctr ls|egrep -i "Name |Replication"

To change the RF-Mode of a Nutanix Storage Container, first show the Conatainer Details:

ncli ctr ls

Identify the correct Container and note the ID of it (all digits after the :: on the ID line)

For example:

ID : 00052c80-729d-8761-000000052fb::1085

Change the Conatiner RF Mode:

ncli ctr edit rf=RF-Mode id=Container_ID  (force=true)

For example:

ncli ctr edit rf=3 id=1085

For the NutanixManagementShare Container, you need the additional force=true Parameter


Montag, 17. Januar 2022

Set Active Network Interface in AHV active-backup configurations

 To check which NIC is active please connect to the AHV host, run the following command:

[root@ahv ~]# ovs-appctl bond/show

In the command output, the active interface will be marked as an active slave.

To change active NIC please connect to the AHV host and run the following command
this sets the active interface!:

[root@ahv ~]# ovs-appctl bond/set-active-slave <bond name> <interface name>

Example:

[root@ahv ~]# ovs-appctl bond/set-active-slave br0-up eth2

This sets eth2 as active interface

You can perform this from CVM with hostssh "Command" for the whole Cluster to set all Active links on one physical Switch if needed.


IPMI (ILO) Configuration via ipmitool

AHV

 To Reset IPMI via ipmitool (if not responding etc)

you can connect to an AHV Host and then

ipmitool mc reset cold

or you can do this for the whole cluster from CVM with:

hostssh "ipmitool mc reset cold"

This resets all IPMIs in the cluster.


To add an user you can check via 

ipmitool user list 1 

wich userspace is unused.

then

** User create on 3

ipmitool user set name 3 ILOUSER

** User set password for 3

ipmitool user set password 3 PASSWORD

** User set Admin privileges (4)

ipmitool channel setaccess 1 3 link=on ipmi=on callin=on privilege=4

Possible privilege levels are:
   1   Callback level
   2   User level
   3   Operator level
   4   Administrator level
   5   OEM Proprietary level
  15   No access

**Enable User 3

ipmitool user enable 3


You can use all of these commands from CVM with hostssh in " "

to set this for the whole cluster.

Example hostssh "user set name 3 USER"


ESXi

On an ESXi Host you can use ./ipmicfg wich can do most in one command:

hostssh "./ipmicfg -user add <ID> <NAME> <PASSWORD> <PRIVILEGE>"

Example:

hostssh "./ipmicfg -user add 3 ADMIN P@ssw0rd 4"

To reset the BMC use:

./ipmicfg -r